Container garden planner
4 things to do NOW to prep for a summer patio garden
If you’re planning to grow yummy herbs and veggies on your patio or deck this summer, you might be looking for a container garden planner to get things ready to go. There are lots of garden planners out there, but if you want the lowdown on the most important steps, start here!
If you’re a planner like me and find it super fun and satisfying to make lists and obsess over seeds and varieties, this is your time to shine!
A thorough plan will help you make the most of your limited time and space this growing season.
That said, not everyone gets excited about research, notes and timelines. I get it. I’m actually a hybrid of the two approaches … I think it’s fun to plan, but I always end up improvising too.
Do what works for you! Plan, improvise or a combination
So if the idea of planning your whole container garden in advance, figuring out timing, and all the little details stresses you out, IT’S ACTUALLY OKAY not to go that route.
One of the best things about container gardening is the flexibility! It’s a lot easier to make changes to a patio garden than an in-ground garden. You can move pots around, experiment with new plants, or switch things up if something isn’t thriving.
So while I think it helps to do some planning on the front end, I’m not going to tell you to drop everything and put together a complete plan for the season.
You do you!
Either way, we’ve got you covered. The 4 fun steps below will help you make the most of your container garden this year, whether you do them all now or wait until planting time.
This post contains affiliate links. That means if you click and make a purchase, we make a small commission at no cost to you.
1. Choose your plants
I’ve always liked to plan my garden but also like to improvise. Inevitably, I’ll start off with a list of must-haves (usually my favorite herbs) and then come home from the garden store or an online shopping spree with four more interesting things to try out.
Container gardens are awesome for many reasons, and flexibility is a big one! This is a fun step but don’t stress about it — you can always add or switch things up later.
Start by thinking about how much room you have and what you like and use most in your cooking. You can check out online seed retailers or pick up a gardening magazine for some old-school inspiration.
If you’re not sure where to go from there, here are some great combinations to try!
Italian herb container garden
These Mediterranean herbs are easy to grow, generally forgiving if you’re not 100% attentive, and amazing fresh or dried in the kitchen. As I write this, it’s February and I’m still using dried supplies of all four of these from my deck garden last summer. So awesome.
Easy veggie container garden
If you’re looking for a few versatile veggies, try these:
- Tomatoes
- Zucchini squash
- Lettuce and other salad greens
- Cucumbers
- Sweet peppers
Unique herbs and veggies
Have you done the tomatoes-and-basil container garden thing before and want to try something new and interesting? These off-the-beaten-path options do well in containers:
Whatever you choose, make a list or chart (dare I say spreadsheet?? If you’re a nerd like me) to make the rest of your prep work easier.
2. Order seeds
These days you can get seeds anywhere, from online heirloom seed companies to your local garden store or even Walmart. You might even have a seed-saving friend or neighbor happy to share a few.
Personally, I like ordering from reputable companies with sizeable organic and heirloom options. That way you know what you’re getting and have some reassurance about quality. Some popular sellers include:

- Botanical Interests – My favorite … very highly recommend! They’ve been selling high-quality seeds (including heirloom, organic and conventional) for 25 years and have beautifully illustrated seed packets loaded with helpful history and tips. This season I’m growing round zucchini, catnip, and okra from their seeds.
- Sustainable Seed Company – I love their seed collections with groupings like culinary herbs, multi-colored tomatoes, and Granny’s Garden heirloom veggies. So fun! Growing guides included.
- Seed Savers Exchange – Their mission is to store and regenerate heirloom and open-pollinated seed varieties, some of which they sell online for home gardeners. This year I got celery seeds from them and some amazing zinnias for the yard.
If you have older seeds from last year and/or you’re buying from a big box store, you might want to check viability before planting. You just need a paper towel and a warm spot — and if you’re unsure about your seed quality, it’s worth the extra step to be sure.

3. Get seed starters and containers ready
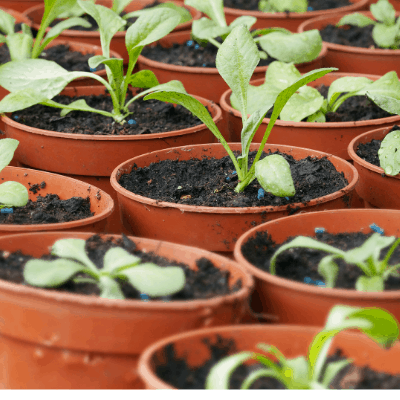
For starting seeds, you need some kind of small container for sowing the seeds, along with starter mix to grow them.

Best seed-starting containers:
- Seed starting trays with 12 cells and humidity control. These are clear plastic, so you can keep an eye on root growth.
- Biodegradable, compostable peat pots. These are 1.75 inch diameter, great for herbs and other small seedlings.
- Or try 3-inch peat pots for bigger seedlings like zucchini.
- Peat pot kits with starting trays. Combo kits give you the biodegradability of peat pots along with the moisture-maintaining perk of plastic trays.
If you’re looking for something cheap and easy, you can even use egg cartons or the cardboard tubes from toilet paper or paper towels. They’re about the size of a cell from a seed-starting tray and biodegradable, so you can just transfer them to the pot when your seedling is ready.
Keep in mind some seeds need to be direct sown, as they don’t take well to transplanting. That includes anything with a taproot like carrots and dill. Check your seed packets for sowing instructions if you’re not sure.
You’ll also need to get seed starting mix, if you’re growing your own seedlings. Seeds should ideally be started in a seed starting medium, rather than potting soil or garden soil. Soil from those sources can harbor pests or harmful organisms. They also have a course structure, while seeds thrive in finely-textured mediums that allow for easier root growth.
You don’t need to get seed starter months in advance, but it’s nice to be all ready to go when it’s time.
If you’re not familiar with seed starting mixes and ingredients, this review breaks it all down for you.
Good seed-starting mixes:
- Burpee organic coconut coir. Pronounced “COY-uh,” this popular medium is made from biodegradable coconut husks, a renewable resource that many people swear by. Bonus: It’s on the Organic Materials Review Institute (OMRI) list of acceptable starters for organic gardening.
- Espoma Organic Seed Starter. Includes sphagnum peat moss, perlite, limestone, yucca extract and beneficial fungi.
- Miracle-Gro Seed Starting Mix. Lightweight, well-balanced mix. You don’t need a lot of fertilizer in seed starters, as seedlings get their first nutrients from the seeds themselves for the first few weeks. This option is a nice middle ground between potting soil and fertilizer-free materials like coconut coir.
- If you want to start your seeds in the containers they’ll stay in, you can use regular potting mix … I’ve actually had great results starting seeds directly in potting soil! I’ve tried a bunch of brands and always return to Miracle-Gro Potting Mix, so that’s what I recommend.
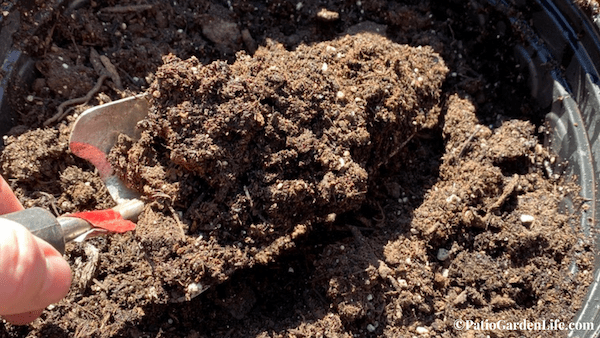
Best potting soil for containers
There are a lot of brands out there, but these are my favorites and most highly recommended brands from gardeners:
Overall top quality
Best organic
How to prep containers for gardening
If you have pots, planters or containers from last year that you plan to reuse, most gardening experts recommend cleaning them well before planting again. Stowaway bacteria, diseases, fungi, pests, or mineral deposits could linger and prevent this year’s plants from thriving. The salts in mineral deposits, for example, can leach water and damage delicate seedlings and stems.
That said … not everyone thinks a full cleaning and sanitizing routine is necessary. I’ve never bleached all my pots, and my plants have done just fine. (Although sometimes it’s almost impossible to pinpoint exactly why a plant doesn’t do well, in my experience it’s usually an issue with something basic like water, light, pests or soil composition.)
You’ll find advocates of both approaches on the many gardening blogs, sites and Facebook groups. So, like with everything else, find what works best for you and stick with that!
How to clean garden containers
The good news: If you do want to err on the side of caution, it’s not hard to get old containers in shape for a new season:
- Scrape and/or brush away dirt chunks and other debris. Scouring pads and stiff cleaning brushes can be helpful here, or even steel wool for stubborn mineral deposits.
- Rinse off with a hose on the sprayer setting and set pots out in the sun to dry.
Even more good news! You can stop there if you want! It’s not the end of the world if you don’t bleach your pots or do a vinegar rinse … and personally I don’t do either. But if you want to be super thorough (or had bad luck with previous plants in those pots), I suggest vinegar. It’s much less harsh and toxic than bleach.
If you want to take that step, here’s how you do it:
- Soak pots in a vinegar solution (1 part vinegar to 5 parts water) for 30 minutes.
- Rinse well with dish detergent diluted in water, then again with water only.
- Set all pots out in the sun to dry.
- Stack upside down in a clean, dry area until ready to use.
Get any containers you’re missing
I know I’m not the only one with a few stacks of pots in the garage … clay, plastic, glazed ceramic. Each year I lose one or two to breakage or age. Sometimes I just don’t need all of them, but I hate to throw them out. I have the same problem on my bookshelves …
On the flip side, I also gain one or two (or more) pots every year based on what I’m growing (and what catches my eye at the garden store!).
Once you’ve taken inventory of the containers you have ready to go, decide if you need more and what sizes and materials. That way you can hit the local nursery with a specific list and ensure you’ll have what you need when you’re ready to plant.
If you’re not sure what size pots you need, Bonnie Plants has an awesome guide to what sizes and types of containers work best for various plants.
Some unique ideas for container garden planters:
- Fabric grow bags are a cool alternative to the traditional 5-gallon bucket. The 5-gallon grow bags and 10-gallon grow bags are my favorite, and they get rave reviews! They’re ideal for bigger vegetable plants like tomatoes and zucchini, with breathable, durable material and handles for easier moving. I use (and reuse) them for cucumbers, pumpkins, greens, zucchini, peas, you name it.
- Raised garden beds are a great option if you’re limited in space and/or have accessibility needs that prevent you from bending down to tend pots on the ground.
- This 2’x2” fabric raised bed is another way to add some versatility to your patio garden. You could use it to group salad greens, herbs, or other shallow-root plants.
4. Clear space on your patio or deck
If you do have a few old pots and containers from last season still sitting around, now is a good time to clean them up (see above) and clear the space so you can see what you have to work with.
I find it super helpful to move everything to the yard, the edge of the deck, the garage or wherever and start with a blank slate.
You might even move the patio furniture, grill, etc., out of the way to get a good look at the space.
Once you have the space clear, sweep off leaves and other debris, then hose down the whole area if possible. Let it dry completely before moving anything back.
If your container garden is on a deck, check for damage to the wood or material, and do any needed repairs before you start setting out your plants.
Then comes the fun part! Go back to #1 (where you chose your plants), and if you haven’t already, make a list, chart, or drawing of what you’re planning to grow and where.
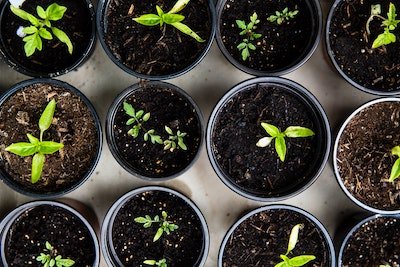
Things to consider when planning your container garden space
- Which plants are must-haves, and are there any you want to add on as an experiment? The must-haves should get priority in terms of space and location.
- What size container does each plant require?
- How far apart do they need to be?
- Does anything have specific sun requirements, or is everything full sun? If so, is there a way to arrange your furniture and containers so the plants get as much sun as possible?
- Do any of your plants have other needs, like a trellis or wind protection? (If you do need a trellis, these K-Brands Tomato Cages are my favorite — for a lot more than just tomatoes!)
- If you have accessibility considerations (like accommodating a wheelchair with standing containers), include those in your plans.
With the four steps in this container garden planner, you’ll be in great shape to kick off the season! Have fun!
Looking for ideas for your container garden? Here are some ideas to try:
- Veggies that grow well together in containers
- How to grow basil in a pot
- How to grow thyme in a pot
- How to grow rosemary in a pot
- Growing zucchini in containers
- Growing okra in pots
- How to grow catnip in pots

