How to dry herbs
Drying your own herbs at home
Nothing beats walking out to your patio garden that’s filled with fresh herbs and snipping some off to use in a meal! However, if you live in an area that gets so cold your plants will die overwinter, make sure you are ready to dry your herbs for storage.
Drying herbs means to get absolutely every bit of moisture out of the plants before storing in airtight containers in a cool, dark place such as your kitchen cabinet away from the stove.
If you have any moisture remaining it could turn to condensation and then mold in your storage jars, so keep an eye on things to make sure they are thoroughly dry.
Keep in mind that herbs with delicate leaves such as cilantro, parsley, and basil don’t retain as much flavor when drying as hardier plants like rosemary and thyme. We’ll talk about a few options for these as well.
And read on to the bottom of this post for advice on how to prepare herbs for tea and some great storage options for all that amazing herbal bounty!
This post may contain affiliate links. If you buy something through these links, we may earn a small commission at no cost to you.
How to prepare herbs for drying
When to harvest for optimal drying
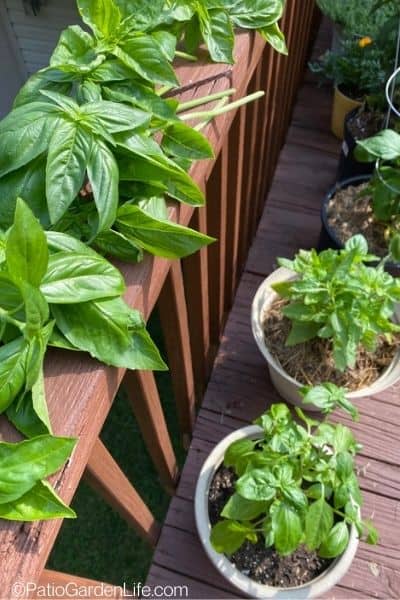
Watch for your plants to be healthy and full of leaves. You want to catch them before they begin flowering though, as then the plant starts transferring nutrients into growing flowers. (If you want more foliage growth, be sure to pinch off those flowers when they appear!)
During the growing season, you can usually cut up to a third of the plant’s branches at a time to ensure it continues providing new growth.
If it is the end of the season and you are done for the year, then go ahead and cut as much as you wish to preserve. You put in the time, energy, patience and watering (so much watering!) to grow these beautiful plants, and drying is a great way to make the most of them at the end of the season.
The best time to take your cuttings is after the morning sun has evaporated the early morning dew on the plants. This will give them the best flavor and also ensure they don’t have excess moisture.
Harvest only when you are ready to begin drying. It doesn’t take a lot of work to prepare plants for drying, and you can choose to do one herb plant at a time or do several batches in an afternoon.
If you harvest too early, you risk mold or decay setting in.
How to prep herbs for drying
It isn’t hard to prepare herbs for the drying process, but each step is important:
- Gently shake your cuttings to remove any loose dirt and bugs.
- Rinse gently under running water, or gently swish in a bowl of cool water.
- The most important step is to dry thoroughly! Pat dry with lint-free tea towels and then lay out to air dry. You need to ensure all moisture is removed or your herbs will steam instead of dehydrate. I’ve made this mistake before, and it’s such a bummer to end up with wilty, unappealing half-dried herbs!
- It’s best to leave most herbs on their stems to dry, or at least with whole leaves rather than chopped. This allows their fragrant oils to stay intact so they are released during cooking or garnishing. However, some larger leaves, like basil, can still do well if you remove them from the stem first.
Note that for all methods, you want to dry until there is no moisture and the leaves easily crumble between your fingers.
Top tips for drying herbs:
- Herbs are properly dried when they easily crumble between your fingers.
- Air drying and using a dehydrator preserve the most flavor.
- It’s easier to under-dry herbs than over-dry them. Do the crumble check to make sure you’re not leaving mold-inducing moisture behind.
- Use glass storage containers to best preserve flavor, and recycle when you use them up!
- Make sure your oven, microwave or other appliance is clean before use. Roasting garlic in the oven right before you dry oregano, for example, could influence the flavor.
How to dry herbs by hanging or air-drying
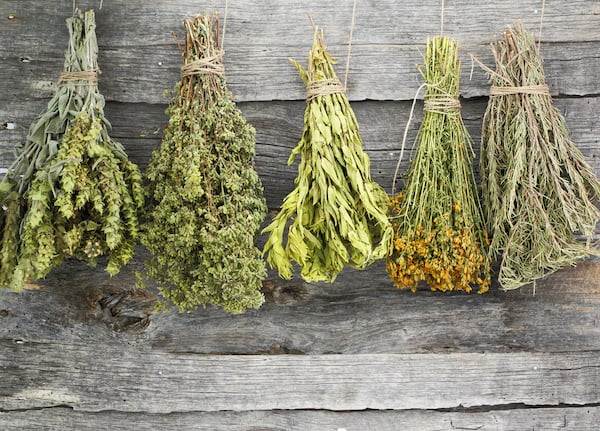
Tie herbs in small bunches and hang upside down in a dark, dry place such as a garage or your basement if it isn’t too cool. You don’t want direct sunlight bleaching your herbs.
Make sure the bundles allow airflow among the leaves, and that you tie them securely as the stems will shrink some as they dry. Kitchen twine is perfect for this, but a rubber band would work too.
If desired, you can tie the bundles inside brown lunch bags that have air holes in them. This can help protect from moist air if you’re in a humid area.
Supplies
- Natural cooking twine – professional grade, super cheap and 23,000 5-star reviews
- Brown paper bags
How long it takes
Delicate herbs like chives and dill are ready in as little as one day. Oregano and rosemary can take 4 days, and sturdy basil needs up to 6 days.
If your herbs aren’t fully dry after that amount of time, keep drying!
How to dry herbs in the oven
This is my favorite quick and easy way to dry herbs for cooking (not for tea). It’s easy and pretty hard to mess up. I think it does a great job preserving flavor too.
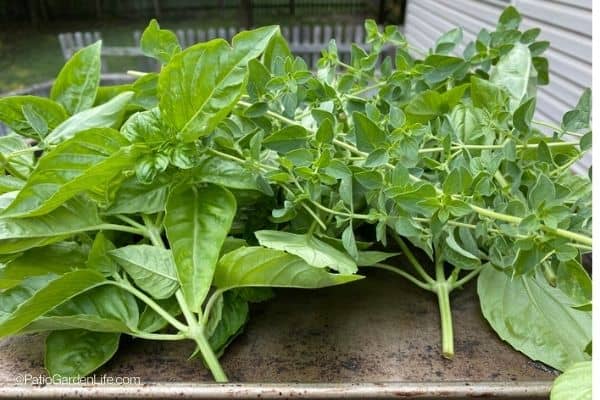
For oven drying, you can use stems with leaves attached or individual leaves for bigger plants like basil.
Place herbs in a single layer on parchment paper on a baking sheet, with plenty of room for good air circulation.
Place in the oven set to the lowest temperature setting, 170-180 F or less. Not all ovens go this low so check before prepping.
This can take a few hours, but I start checking at the 1-hour mark. Smaller herbs like thyme won’t take much longer than 60-90 minutes, but larger herbs can take longer.
Some people crack open the oven door, to make sure it doesn’t overheat. This might be a good idea if your oven runs hot or has a higher low-temperature setting.
Another option is to leave the oven on low and then turn it off after 60-90 minutes. Leave the herbs in the oven, door closed. Check every 20-30 minutes.
Supplies
- Shallow baking sheet – Amazon’s top choice cookie sheet
- Parchment paper
How long it takes
2-4 hours
How to dry herbs in the microwave
Set leaves between layers of paper towels and microwave in 20-second intervals, rotating them and flipping and checking each time.
Let cool to check for any remaining moisture before storing.
While this could work in a pinch, I think microwaves are risky for drying herbs because they have high temperatures and can create hot spots, where part of the plant gets overheated while other parts don’t get dry enough.
Supplies
- Microwave-safe plate
- Paper towels
How long it takes
Minutes!
How to dry herbs in a dehydrator
Lay out leaves and stripped herbs on mesh dehydrator trays. Set to 95 F.
If your herbs have smaller leaves and/or they’re blowing around, you may need to sandwich them between two trays.
Supplies
- Electric food dehydrator – the perfect size for drying herbs
How long it takes
- Smaller leaves from herbs like marjoram and thyme: about 5 hours
- Medium leaves like oregano and rosemary about 12 hours
- Larger leaves like basil 18 hours
How to dry herbs in an air fryer
Air fryers are so popular now! I haven’t tried it yet, but the consensus is that parsley and basil work well in air fryers.
Set to 360 F and preheat for 2 minutes.
Add your leaves between a rack and the air fryer basket so they don’t fly around, and roast for 3 minutes.
Do the crumble test and cool before storing.
Supplies
How long it takes
3 minutes.
How to dry herbs for tea
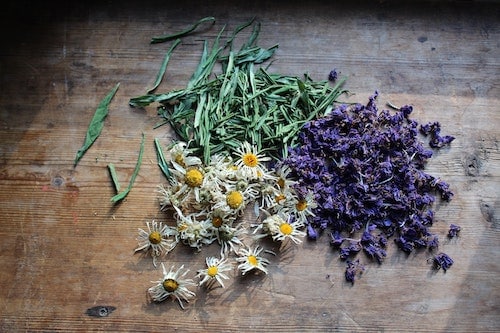
Air drying and dehydrating are best to keep flavors in your herbal teas.
Tea brings out the delicate, complex herbal flavors of some of our favorites like chamomile, lemon balm, mint and thyme. Catnip also makes lovely tea for humans with calming properties (for cats, it’s a stimulant when sniffed and calming when ingested).
So for tea, it’s important to dry the herbs in a way that preserves the oils and other compounds that contribute to the unique complexity of each one.
While I like oven drying for cooking herbs like basil and oregano, that heat level is often too high to be optimal for tea.
After you harvest, either use the air-drying method above (by hanging bunches in a dry, dark place) or use your electric dehydrator.
Store the herbs in glass jars to further preserve the delicate oils and flavors.
It’s a good idea to have some tea bags or strainers on hand, for when you want to brew your own.
I like these reusable stainless steel tea strainers for loose leaf tea. Traditional tea bags work well too, and if you want something more sustainable than the usual disposable tea bags, I recommend these biodegradable, compostable tea sachets.
So when you’re ready for a hot mug of herbal goodness – or refreshing non-caffeinated iced tea – follow these steps to brew a cup of loose-leaf herbal tea and enjoy!
Other ways to preserve herbs
- Freeze chopped herbs in an ice cube tray with water or olive oil. You can easily drop these frozen cubes into soups.
- Pesto freezes beautifully in ice cube trays so you can remove as much as needed.
- Herb butters are another great option. Stir chopped herbs such as chives into softened butter. Reshape in plastic wrap and freeze until needed.
How to store dried herbs
I always use and recommend small glass jars for storing dried herbs.
While there are a lot of plastic options, I’ve found glass jars to be the easiest to use, the best at preserving flavor and texture of dried leaves, and better for the environment than plastic.
They’re also super affordable, considering you’ll be able to use them for many years. Here are some great options popular with home herbalists:
- 4 oz glass spice jars with airtight screw top
- 4 oz glass jars with airtight hinged lid
- 4 oz square mason jars with airtight lids
If you’re growing herbs in your container garden, learning to dry them is one of the easiest ways to ensure you’ll have homegrown herbs all year. It’s a great way to bring your herb garden to life in the kitchen and have those summer savory flavors year-round. Let us know how it goes in the comments!
