How to grow garlic in pots
The ultimate guide to growing garlic in containers
Garlic is one of those kitchen staples that you might not realize is easy to grow yourself, even with limited space. Once you know how to grow garlic in pots and when to harvest it, it’s really just a matter of planning ahead — because garlic takes a LONG time to grow.
How long? About 8-9 months … so basically like a human baby! Much, much longer than just about anything else you might grow in a container garden. But also much, MUCH, MUCH easier than growing a human. So that’s good.
Anyway, if you want to harvest in June, that means planting in mid-October!
There’s good news though. Garlic doesn’t require a lot of care once it’s planted and growing, other than a little mulch, some water and a fertilizer boost now and then.
I don’t know about you, but I often find myself either running low on fresh garlic or letting it sit so long it starts growing greenery. It all depends on which recipes I’m currently cycling through the dinner routine.
So the idea of growing my own supply — from individual cloves — for fresh use and drying is so appealing. If growing garlic in containers appeals to you too, give it a try this year and let us know how it goes!
Keep reading for all the details about how to grow garlic in pots, including how to plant cloves, the difference between hardneck vs softneck garlic, when to harvest garlic and the best fertilizer (hint: it’s not the same kind you use for herbs and veggies!).
This post may contain affiliate links. If you buy something through these links, we may earn a small commission at no cost to you.
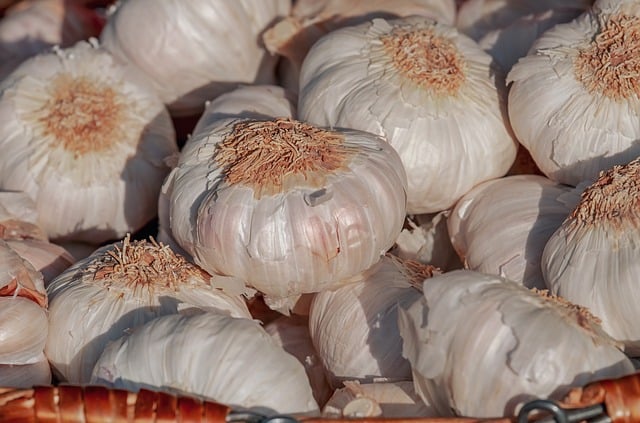
When to plant garlic in pots
Remember how I said garlic has a really long growing period of 8-9 months? That’s one major reason why it’s usually planted in fall for a summer harvest. (Another reason is that hardneck garlic needs a certain amount of cold temperatures for germination … but we’ll come back to that!)
One thing to keep in mind is that garlic is frost-hardy but does best if it has a head start, to get strong roots established before the cold winter months.
So for areas in cold climates, (zones 3-7 in the U.S.), it’s recommended to plant garlic a few weeks before your first expected frost date. That generally means sometime between mid-September and mid-November.
For milder climates like zones 8-9, you can plant garlic really anytime through December.
- The key here, and this is important: In warmer climates, you first need to trick the cloves into thinking they’ve had that cold germination period.
- The easiest way is to put them in a paper bag and tuck them in the back of the produce drawer in your fridge for about 4-6 weeks.
- Always be sure to read growing instructions for the variety you choose, as some are more heat tolerant than others.
To double check the dates for your zone, check out the first and last frost dates calculator from the Old Farmer’s Almanac.
This garlic planting chart from Grey Duck Garlic gives you more specifics, if you’re still unsure.
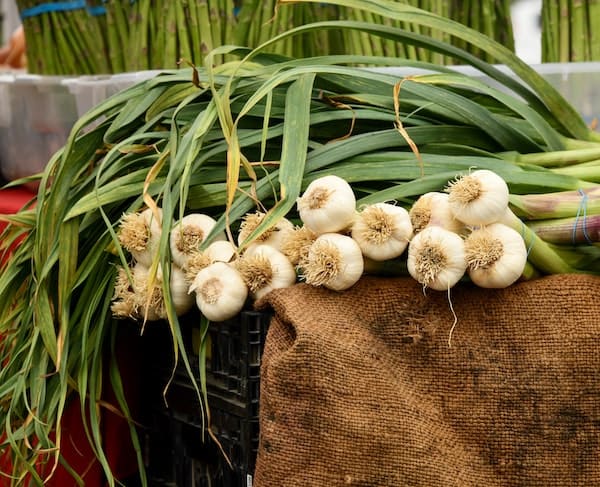
Growing garlic in containers
Like most edible plants, garlic needs full sun and well-drained soil.
Garlic (allium sativum) is part of the allium family, which includes other bulbous flowering plants like onions, chives, shallots and leeks.
While herbs and vegetables start from seeds or seedlings, some alliums start from cloves, including garlic. When you see seed companies or other retailers selling “seed garlic,” they’re referring to cloves intended for growing garlic (vs culinary use).
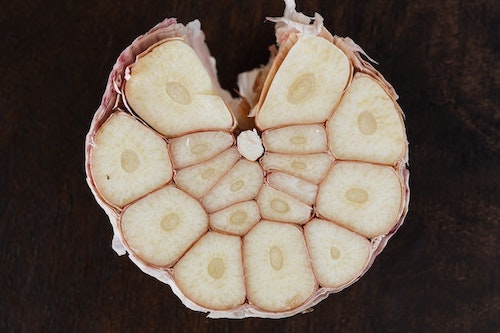
(In case you’re not 100% sure what I’m talking about … cloves are those sections you break off from a bulb to cook with. The average garlic bulb you buy in the store has 10-20 cloves of varying sizes.)
How to plant garlic in a pot
To plant garlic, separate the individual cloves and place them in well-drained potting soil, about 2-3” deep. Leave the papery skin on the cloves as much as possible. Potting soil is light enough that you can usually just push the cloves in with your finger, no need to dig a hole. Just make sure they’re covered.
No matter what, be sure to plant the cloves with the pointy end up! Roots grow from the wide, flat part of the garlic bulb, while the stalk and leaves grow from the top.
If you’ve ever let garlic sit for too long in your kitchen (who hasn’t??), then you’ve probably seen little green shoots emerging from the pointy side. Keep that picture in mind when you plant.
Cloves should be planted about 4-6” apart, so, by pot size:
- 10-inch diameter: plant 3 cloves
- 12-inch diameter: plant 4 cloves
- 20-inch diameter: 8-10 cloves
Each individual clove will produce a garlic bulb with anywhere from 6-20 cloves, depending on variety and conditions. With softneck varieties, the largest cloves will be on the outermost inner layer of the bulb, while hardneck varieties have more uniform cloves.
If you want enough to use some fresh and dry some for use through next winter (it can keep for months once dried), you’ll want to use a bigger container. See below for some recommendations.
Can I grow garlic from store-bought garlic?
As tempting as it is, don’t use store-bought garlic to plant your own! Most commercially produced garlic is treated with chemicals to inhibit sprouting.
In addition, garlic from the grocery store can also carry microscopic pests including viruses and parasites.
It’s best to get garlic cloves from a seed company or garden store.
The exception would be organic, locally grown garlic that you know hasn’t been chemically treated. But even these I would get from a farmers market, where you can verify with the actual grower that the garlic is suitable for planting. (If you’re not sure where the nearest one is, check out the USDA’s National Farmers Market Directory.)
To get garlic cloves for planting (and any other seeds you need), I highly recommend Botanical Interests. FYI some varieties aren’t available until close to the growing season, around August or September.
Best container for growing garlic
The ideal container for garlic is big enough for the amount you’d like to harvest, not too porous so it will help maintain moisture levels, with drainage holes and light enough to move if needed.
Here are some great affordable options:
- 20.5” Whisky Barrel Planter – Looks like wood but made with resin, so it’s lightweight (3 pounds), easy to move, and retains water better than clay or terracotta.
- 3-piece wooden barrel set – These are real wood and would make a great grouping with some fall mums! You can add a layer of straw for mulch over the planted garlic, then set some pumpkins or other decorations on top for Halloween. Or you could sow some lettuce and spinach in the smaller pots, for a mid-fall salad harvest and then replant in spring with more greens, herbs or annuals.
- 15.5” large square planter – Looks like sandstone but made from lightweight, durable plastic, with a removable drain plug. You could get about 5-6 garlic plants in here.
Whatever you choose, just keep in mind those ideal characteristics, and pick something you like to look at. That container will be in service for almost a year!
Hardneck vs softneck garlic
There are many different varieties out there, but first it’s important to understand the two main types of garlic: softneck and hardneck.
| Hardneck garlic | Softneck garlic |
|---|---|
| Has a hard flowering stalk (scape) | No hard central stalk |
| Stronger, more complex flavor | Milder flavor |
| Needs winter cooling period during germination (vernalization) | Does not need cooling period |
| Best in zones with cold winters | Best in mild or warmer climates |
| 8-12 larger cloves per bulb | 10-20+ smaller cloves per bulb |
| Can be stored 4-6 months | Can be stored 9-12 months |
| Thick papery skin is easier to peel than softneck varieties | Ideal for drying and braiding |
Best varieties of garlic for containers
Softneck garlic varieties
- Texas Rose – early harvest, medium flavor, can handle some spring heat
- California Early – popular variety, mild flavor, stores up to 6 months
- Inchelium Red – popular variety for cooking, mild flavor
Hardneck garlic varieties
- Spanish Roja – one of the most popular hardneck varieties used in restaurants and kitchens, bold flavor
- Russian Red – easy to peel, rich flavor, can handle very cold winters
- Georgia Crystal – large cloves, rich flavor, doesn’t love high heat
- Metechi – huge cloves, strong flavor
How to take care of a potted garlic plant
Watering instructions

Garlic needs consistent watering, even throughout the cold months when it’s dormant in the pot. Water every few days (unless the soil is frozen) and aim for about 1 inch per week.
From spring through harvest, water 1-2 inches per week but make sure soil dries a bit in between watering, to avoid rot.
To help maintain moisture levels, mulch with several inches of straw, grass clippings or other organic matter. Water deeply after applying the mulch.
Remove mulch in spring after the last expected frost date.
And seriously … don’t forget to water throughout the dormant/germination stage! Not watering enough over winter is one of the most common mistakes when growing garlic.
How to fertilize garlic
(You’ll probably find confusing or even conflicting advice about this topic on gardening sites. I’m not a horticulturist or a garlic farmer, so I researched this heavily from credible sources, to make sure I give you the best guidance possible!)
Garlic is a heavy feeder, which means it needs fertile soil and a high amount of nutrients for optimum growth.
However, unlike the herbs and veggies growing in your container garden, garlic is a bulb like crocuses and hyacinths.
That means garlic has specific nutrient needs, considering the long growing period and bulb development. It’s important not to over-fertilize, especially with nitrogen, which can inhibit bulb growth.
For these reasons, garlic should be fertilized with a nitrogen-heavy fertilizer for early growth and left alone once bulbing starts.
However, any edible plant grown in containers can benefit from nutrient boosts. They have access to a limited amount of nutrients in a finite amount of potting soil, and frequent watering can leach some of those throughout the season. A simple slow-release fertilizer won’t hurt and can help.
Best fertilizer for garlic
- When planting, mix a slow-release fertilizer into the potting soil to give the garlic a boost during the long germination period. My go-to is Jobe’s Organics Slow Release Plant Food.
- In spring, apply a nitrogen-heavy fertilizer a couple of times (several weeks apart) to help with early growth. Fertilizing garlic with fish emulsion is a good way to get nitrogen. I use and highly recommend GS Plants Organic Liquid Fish.
- Stop fertilizing when bulbs start developing, as nitrogen in particular can inhibit bulb growth. How will you know? Good question! You won’t exactly … but if you plant in October, early May is a safe bet. Continue to water 1-2 inches per week.
When to harvest garlic
You’re probably wondering how on earth you’ll know garlic is ready, when it’s growing mysteriously under the soil. It’s so satisfying to watch tomatoes and zucchini flower and swell on a vine or herbs grow bushy and green.
The only indicator you have with garlic are the green leaves, or shoots.
Hardneck varieties also send up garlic scapes, which look like long curly stems, a few weeks before bulbs are ready for harvest. You’ll want to cut the scapes back, to make sure the garlic is sending more energy to the bulb.
Scapes and shoots are all edible and have a mild garlicky flavor. They can be sauteed on their own, tossed into stir fry or included in pretty much any recipe that calls for garlic.
Garlic is ready to harvest when ⅓ to ⅔ of the lower leaves wither and turn brown or yellow. Depending on when you planted, this could be anytime between early summer and late July.
At that point, it’s a good idea to dig up a test bulb to see how it’s going. If it looks good and the cloves are well formed and tight against the skin, you know it’s ready!
If so, stop watering and let them sit in dry soil for a few days to a week. Then pull out gently with a trowel, garden fork or hand shovel.
Resist the urge to pull them up by the leaves! The stalk can yank out of the bulb and pull apart the individual cloves.
How to cure garlic
Now that you know how to grow garlic in pots and you’ve successfully harvested your crop, you need to cure it, which helps it dry out for preserving.
After you harvest the garlic bulbs, leave the stems on and shake off any large clumps of dirt (but don’t worry about scrubbing clean quite yet). Set them in a cool, dry place away from sunlight like a basement or garage. Leave them to cure for 2 or 3 weeks.
Once the remaining dirt and outer skin dries out, give them a good shake and brush them clean. Make sure you leave the papery skin on the outside! Trim back roots, close to the base of the bulbs.
If you’re planning to braid it, leave the stems on. Otherwise you can cut them down to the bulb.
How to braid garlic
Braiding is a traditional (and pretty!) way to store your softneck garlic. Even if you only grow a few bulbs, it’s a great way to save it for future use.
Here’s a great visual tutorial on how to braid your own garlic:
Planting garlic in summer
If you miss the fall planting window, you can plant in early spring if you’re interested in using the leaves and scapes in the kitchen.
You won’t get complete bulbs, but the greens will produce for a few months. Some people also dig up and use the immature bulbs once the leaves die back. They won’t have the fully developed flavor and texture of mature cloves, but they’re usable in a pinch.
How to grow elephant garlic
You might be surprised to learn that elephant garlic is actually a type of onion, more closely related to leeks than regular garlic.
Elephant garlic looks exactly like regular garlic, but, as the name implies, it’s HUGE. Bulbs can weigh as much as 1 pound! The flavor is actually milder, despite the larger size.
Follow the same planting and care guidelines as regular garlic.
Elephant garlic is a biennial, which means it needs two growth seasons to fully produce. In the first season, it will produce one large single-clove bulb. In the second season, that single clove will split into several cloves.
The first season bulb is usable and can be harvested as is — or leave it for the following year and harvest even more.
Now you know how to grow garlic in pots, including planting instructions, the best fertilizer for garlic and how and when to harvest! Have you tried it in your container garden? Let us know in the comments!
More ideas for your veggie container garden:
- Veggies that grow well together in containers
- Growing zucchini in containers
- Growing okra in pots
- Growing pumpkins in containers
- How to grow green beans in a pot
- Fall and winter vegetables for container gardens
The form you have selected does not exist.


I have just read the garlic in containers and am in northern Victoria, Australia.
So interesting.
I am growing in reused milk cartons, cut in half, bottom saucer, top growing vessel.
Have had in potting mix since March(south hemisphere autumn start), and ready to put in later seasons bulbs. First frost, now in May 18th 2022, will be around the corner so hope they go ok.
Such an interesting site.